Minimal Unity project
This guide aims at building a minimal Unity project that is compatible with Mad Island so you can properly build AssetBundles for it. It also covers linking to Yotan Mod Core as a starting point for creating customizations.
Pre-requisites
- Download Unity v2021.3.45f2 from Unity Hub
- Download Spine Unity Runtime v3.8 from Spine site
- Direct link: spine-unity 3.8 for Unity 2017.1-2020.3
- Have a copy of Mad Island installed -- We will reference it as
<MadIsland folder> - Download the project template -- We will reference it as
template- At the end of this doc there will be an explanation on how this template was created and why certain things are done.
- Download Mad Island stripped and "fixed"
Assembly-CSharp.dllfrom Yotan's repository- At the end of this doc there will be an explanation on how this DLL was created and why certain things are done.
Preparing the project
- Extract the downloaded template somewhere
- Open Unity Hub and choose Add > Add Project from disk
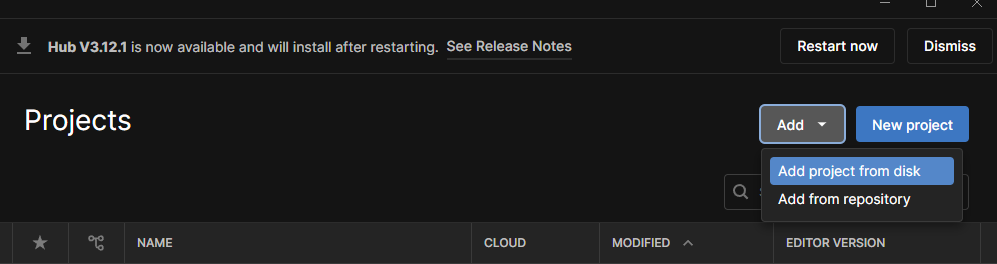
- Choose the folder with the template and click
Add Project - It will display in the list of projects in Unity Hub, open it
- You should get a Unity project with:
Editorfolder with AssetBundle creation script- an empty
Plugins
- Drag and drop the
spine-unitypackage you've downloaded into the Assets folder - The import window will show up, deselect
Spine Examples
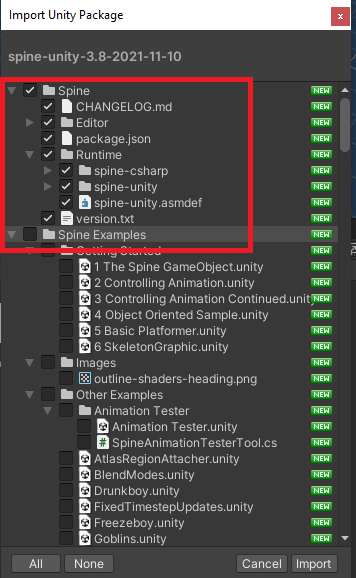
- Click
Importand wait for it to finish - Drag and drop the downloaded
Assembly-CSharp.dllinto Unity's Plugins folder - Drag and drop your
<MadIsland folder>/Mad Island_Data/Managed/com.rlabrecque.steamworks.netinto Unity's Plugins folder (Assembly-CSharp depends on it, and will error without it) - Unity should not show any errors at this point (a few warnings are fine)
You now have a minimal working project for Mad Island modding. It does not include the game assets, but this is something for another day.
Next, we will set up Yotan Mod Core so you can get started adding stuff.
Updating
Whenever the game updates, you will most likely want to update your project as well.
Warning
DON'T drag and drop the Assembly-CSharp.dll file, it will cause issues.
- On Windows File Explorer, open your Unity Project and go to
Assets/Pluginsfolder - Copy the new version of
Assembly-CSharp.dll(Downloaded from Yotan's repository) into it, and accept replacing the old one - Go back to Unity and it should recompile and work in the new version
Next steps
Now that we have a project, we can start adding stuff to it.
You most likely will want to use Yotan Mod Core to get started, as it will ease your work.
Creating the project from scratch and reasoning
Note
This section is only for reference, you don't need to follow it if have downloaded the template.
This was roughly based on https://github.com/Valheim-Modding/Wiki/wiki/Valheim-Unity-Project-Guide
Download AssetRipper and
extract all assets from Mad Island -- this will be referenced as <MI RIP>
Create an empty folder -- this will be referenced as <Template>
Go to <MI RIP>/ExportedProject/ and copy Packages and ProjectSettings folders into <Template>
Note
Packages folder contains your project's dependencies, like Unity libraries, and
copyting it ensures we have the same dependencies and avoid errors.
ProjectSettings folder contains project settings like project Tags and Layers,
we need those to match the game when creating items and etc.
Open <Template>/Packages/manifest.json and add the following:
    "com.unity.localization": "1.3.2",
    "com.unity.postprocessing": "3.2.2",
    "com.unity.services.lobby": "1.0.3",
    "com.unity.textmeshpro": "3.0.6",
	"com.unity.services.leaderboards": "2.3.3"
Note
Those dependencies are also used by Mad Island, but for some reason not included during the RIP. We add them as we are likely to have issues or need them when modding.
On your <Template>, create this structure:
Assets/Editor/CreateAssetBundles.cs-- Script to create Asset Bundles
Plugins/-- Folder for DLLs that we depend on (E.g. Assembly-CSharp -- we don't ship those)
And that's it! Don't open it on Unity or it will generate lots of other files
Preparing Assembly-CSharp.dll
The game's Assembly-CSharp.dll contains all the game code and Unity stuff. If we try to use it as is, we get several errors, specially related to Post-Processing libraries.
Since those are specific to some very weird classes that is unlikely to anyone to need, I decided to remove them from the DLL so it stops erroring on Unity, while we can still reference everything else in our code.
Additionally, to make it possible for me to distribute it in a downloadable format for my own use and for other modders, the DLL also goes through a "stripping" process, which removes all the code, only keeping the "interface" (classes, methods, etc), every code block is simply a "Throw".
This process is done by a modified version of BepInEx Assembly Publicizer, which can be found here: https://github.com/yotan-dev/mad-island-mods/tree/main/AssemblyStripper